


4.3 Working with Variables.
Now, we will see how to work with Variables Constants within Unity and C#.
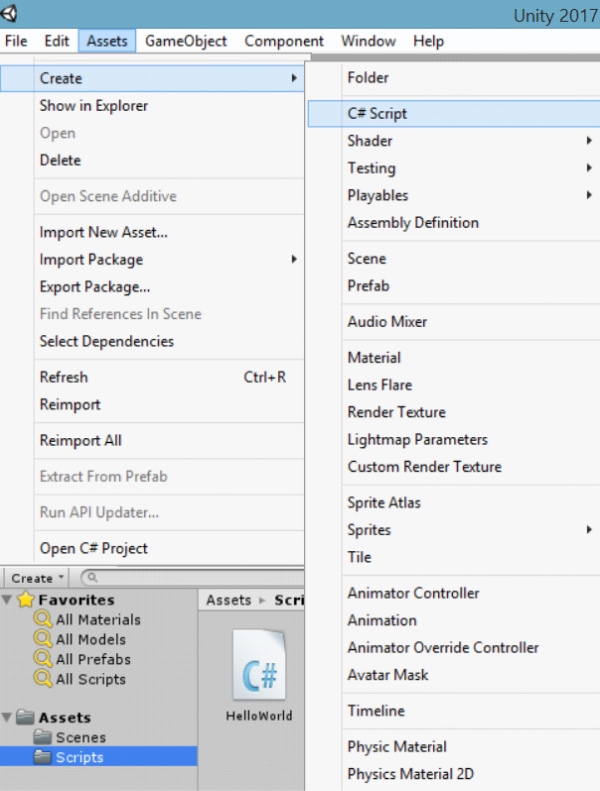
In Unity, let's create a new Script called “MyVariables” (in the “Project” window, “right click” over the “Scripts” folder and choose Create → C# Script). Another way to create a Script is, by selecting the “Scripts” folder and from the Menu Bar go to Assets → Create → C# Script.
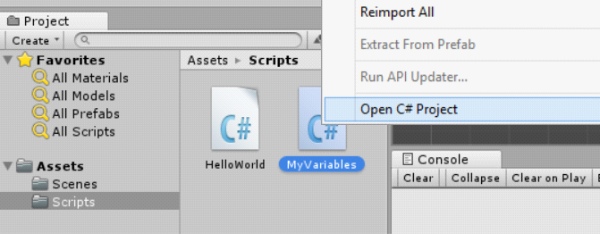
Once the file “MyVariables.cs” is created, “double click” over it to open the code editor (or try a “right click” over the script and choose “Open C# Project”.
With "MyVariables" open in the code editor, let's create the “First Variable” and the “First Constant” in order to show them as part of some messages in the "Unity's Console".
Within the “MyVariables” Class but before the “Start” and “Update” Methods, let's "create" (or "declare") the next Variable and Constant:
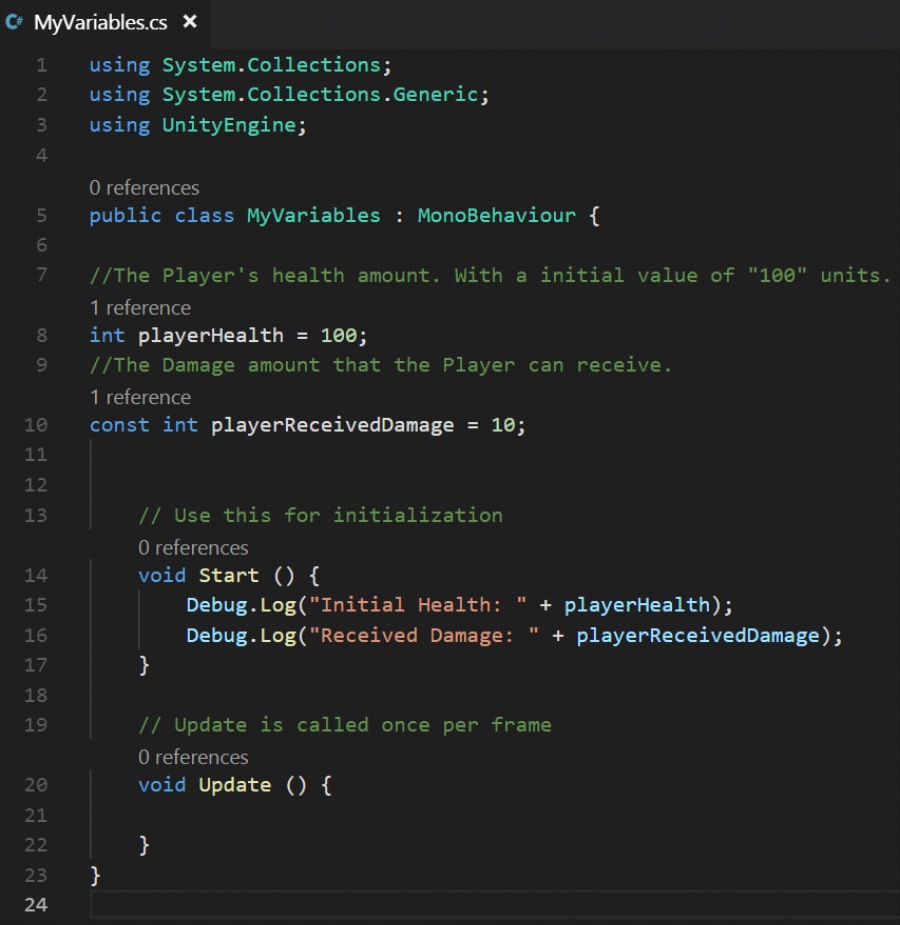
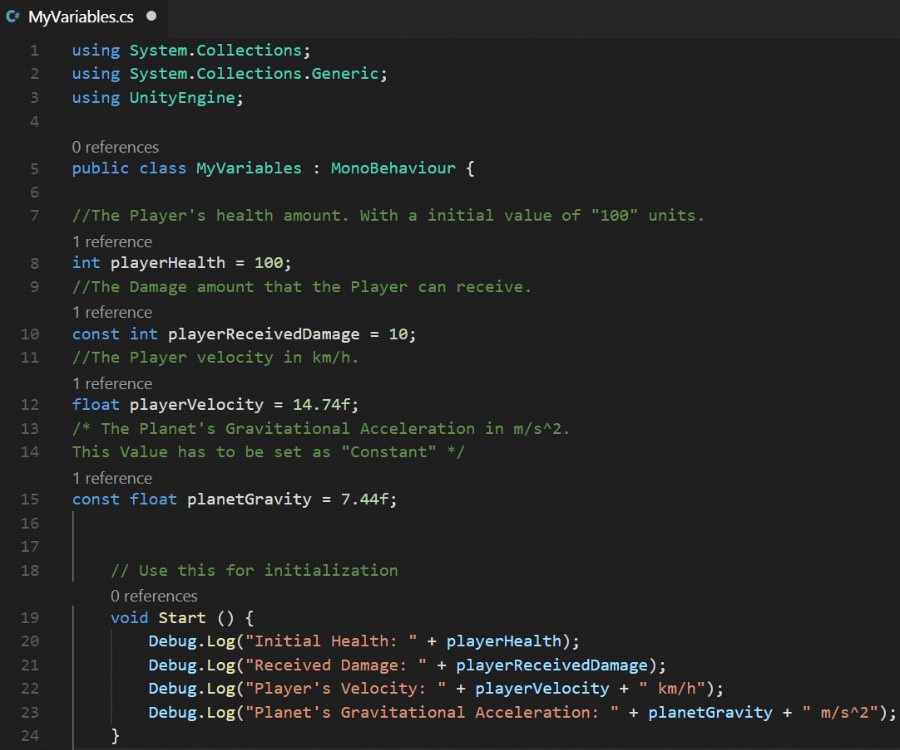
//The Player's health amount. With a initial value of "100" units.
int playerHealth = 100;
//The Damage amount that the Player can receive.
const int playerReceivedDamage = 10;
Note: The text that is after the "double slash" ( // ) is called "Comments", and it helps us to leave notes within our code, annotations that help as a reference to know with a little more detail what we are doing. The comments are not taken into account when compiling and executing our code; what is after the two diagonals and on the same row is considered as Comments (then, we will see another way to write comments that use more than one row).
Now, inside the “Satrt” Method, let's type:
Debug.Log("Initial Health: " + playerHealth);
Debug.Log("Received Damage: " + playerReceivedDamage);
“Debug.Log” helps us to display messages in the Unity's Console, these messages must be in "Text" format (between "double quotes"); in the case of variables and constants, we do not put them in double quotes because what we want to know is the value they store (otherwise in the Unity's Console we would see only the "Variable or Constant name" and not its value).
The “plus” (+) symbol between the showing text and the variable or constant is used to indicate that we are "adding" (concatenating) more information to display.
All the coding must look like this:
Let's "Save" the Script ( Ctrl+S ).
Now switch to the Unity Editor Interface (remember to wait a bit while Unity takes the changes made in the code editor).
In the “Hierarchy” window, select the game object named “GameObject”, once is selected, look at the “Inspector” window and remove the “Hello World (Script)” “Component”(remove the “HelloWorld” Class Instance). To remove it, click over the “small cog” at the component's upper right corner (each game object's component has one) and choose “Remove Component” from the displayed menu.

With this the component “Hello World (Script)” will be removed (and cannot be executed when running the scene).
The next step is to add the “MyVariables”script as "Component" to this same game object (just click on the “Add Component”, then from the displayed menu choose “Scripts” and select “My Variables”).
Once the “My Variables” Component is assigned (the “MyVariables” Class Instance), is time to click on the “Play Button” of the Unity Editor Interface to run the scene (while running the scene, the “Play Button” will be activated, and its color will change from “Black” to “Blue” color, keeping in Blue until the scene is stopped).

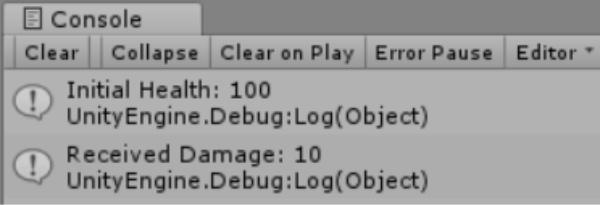
The Unity's Console will show:
Let's click on the “Play Button” again in order to stop the scene (the “Play Button” will change its color back to “Black” 😀 ).
Now, go back to our code editor to add more variables and constants. After the constant “playerReceivedDamage” let's type:
//The Player velocity in km/h.
float playerVelocity = 14.74f;
/* The Planet's Gravitational Acceleration in m/s^2.
This Value has to be set as "Constant" */
const float planetGravity = 7.44f;
Note: When using “Comments” that requieres more than one row; use the symbols “ /* ” and “ */ ” tu write the comments between them.
Inside the “Start” Method, let's type:
Debug.Log("Player's Velocity: " + playerVelocity + " km/h");
Debug.Log("Planet's Gravitational Acceleration: " + planetGravity + " m/s^2");
Note: Use the “+” symbol when to add more information for the message is required (from this example: "text" + variableValue + "more text").
The Script will look like this:
Save the Script ( Ctrl+S ).
Switch to the Unity Editor Interface (remember to wait a bit while Unity takes the changes made in the code editor) and Run the Scene.
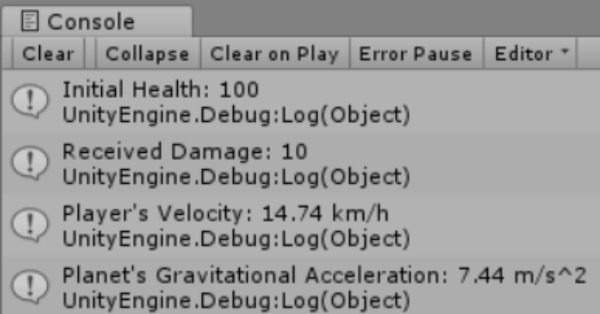
The Unity's Console will show:
Stop the scene. Now switch back to the code editor to add the following Variables and Constants. After “planetGravity” let's type:
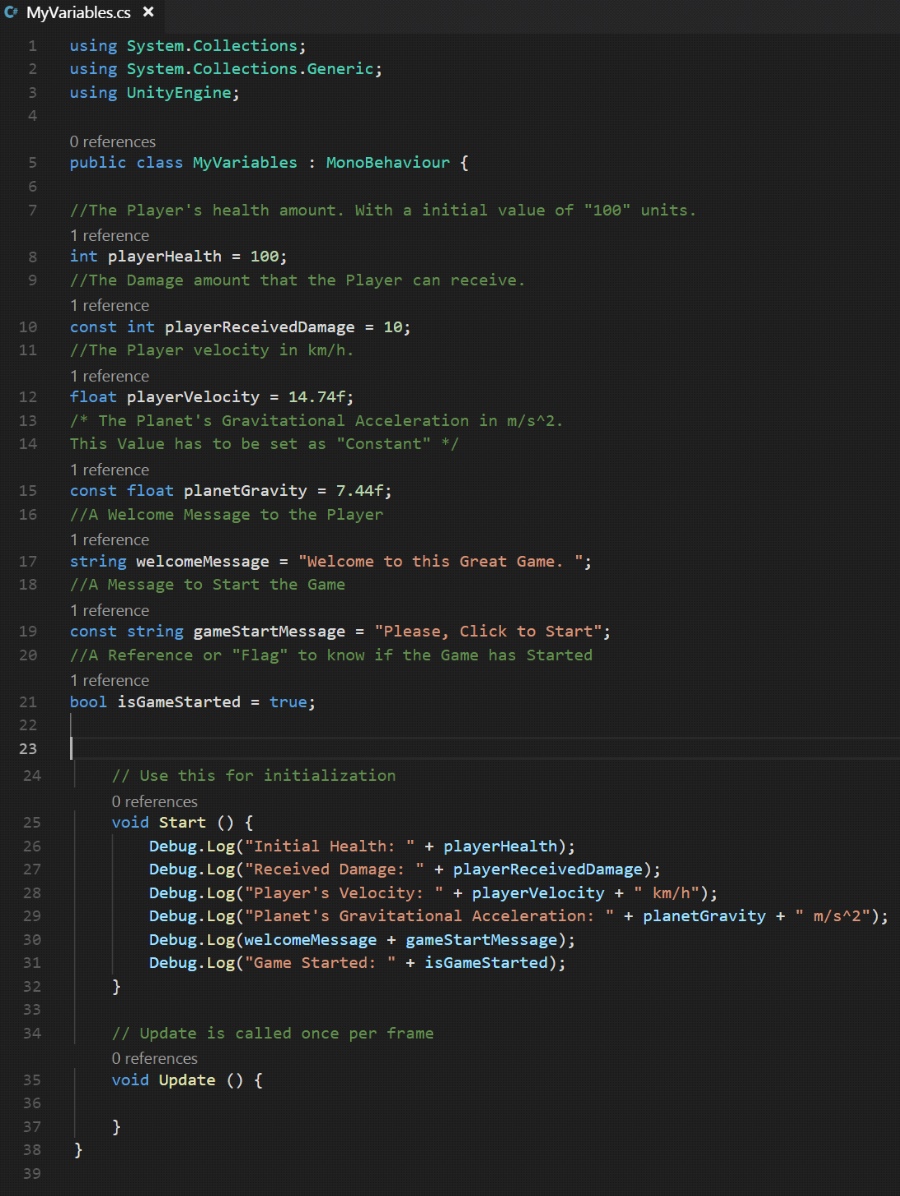
//A Welcome Message to the Player
string welcomeMessage = "Welcome to this Great Game. ";
//A Message to Start the Game
const string gameStartMessage = "Please, Click to Start";
//A Reference or "Flag" to know if the Game has Started
bool isGameStarted = true;
Inside the “Start” Method, type:
Debug.Log(welcomeMessage + gameStartMessage);
Debug.Log("Game Started: " + isGameStarted);
The Script will look like this:
Save the Script ( Ctrl+S ).
Switch to the Unity Editor Interface (remember to wait a bit while Unity takes the changes made in the code editor) and Run the Scene.
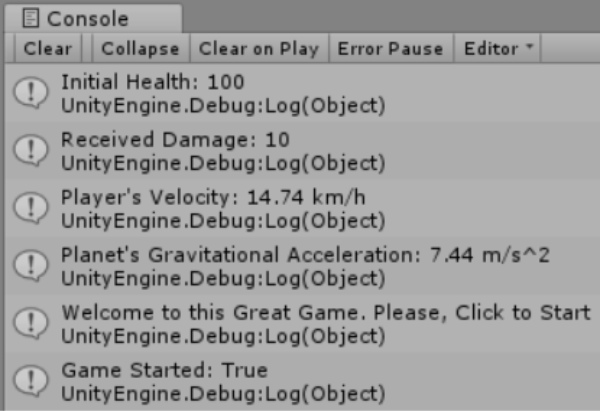
The Unity's Console will show:
Stop the scene.
Before finalizing, save all your work (go to File → Save Scenes and then File → Save Project).